How to Find Center and Set Z-Axis Tool Offset on a 4-Axis Machining Center?
In the field of CNC machining, four-axis machining centers are known for their high efficiency and precision, and are widely used in the machining of complex parts. However, for many beginners, the centering and tool setting operations on four-axis machining centers are still a challenge. In this article, we discuss how to determine the center of a cylindrical core rod by measuring its diameter. We also explain how to facilitate tool setting by moving the tool setting point to the workbench. Additionally, we introduce how to find the center of a circular workpiece on a 4-axis machining center, and provide the specific operating steps.
How to Find Center on a 4-Axis & Z-Axis Tool Setting Steps
When dealing with a 4-axis system, the 4 axes are typically referred to as the A-axis, which is a rotational axis. For example, if you have a circular workpiece, the coordinate system is usually placed at the center of the circle. To find the center of the circle, you can follow these steps.
– We first need to understand where the coordinates of this 4-axis, rotating axis, will be set. If it’s like the one in the picture, the 4-axis coordinates must be set at this center of rotation, which is the center of the A-axis and Y-axis, and then the workpiece will rotate around this central point.
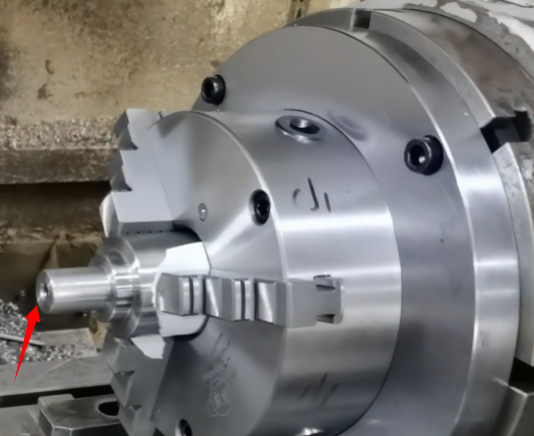
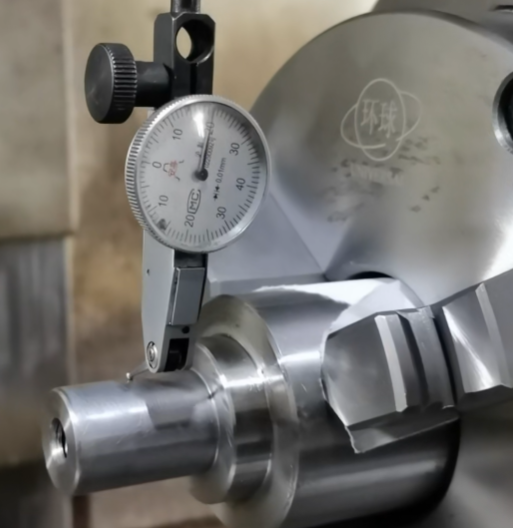
– For a cylindrical part like this, how do we find the center? We use a cylindrical core rod, which has been ground by a grinder. We need to first strike the bounce of this cylinder, the smaller the better. After finishing, rotate it.
Note: The device used to measure the concentricity or runout of the four-axis machining center is called a “concentricity measurement indicator”. This type of device is used to measure the runout between the workpiece axis and the spindle axis. It can compensate for any concentricity errors between the spindle and the tool holder. The concentricity gauge has a large dial indicator and interchangeable probe tips. Additionally, the concentricity indicator can work in conjunction with a PC-based runout testing software that automatically collects the measurement data and displays it in a trend graph. The software can also automatically calculate the runout value and provide a pass/fail assessment.
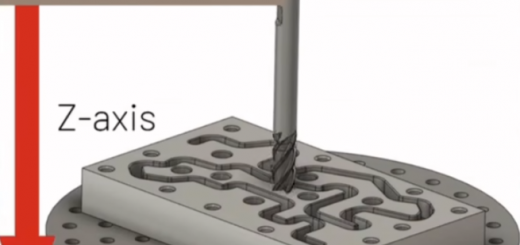
– How should we find its center next? We will use a dial indicator to measure its diameter. For example, if the diameter is standard 25, the radius is 12.5, then we should start from the top and end at 12.5, which is the center of its z-axis.
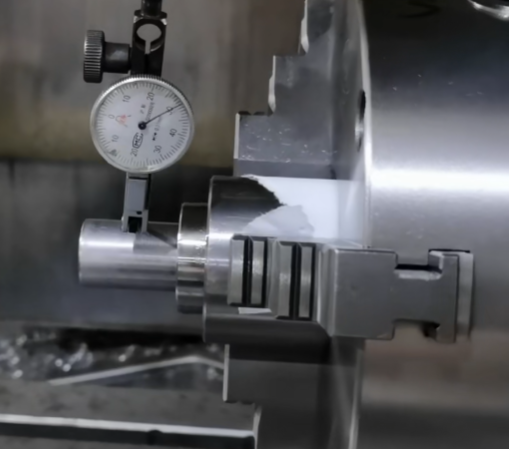
– We now know what its radius is, we can’t set tool at the top, as it has a curved surface. In this case, we need to move the tool setting point away from the top and onto the workbench surface. This will make it more convenient for tool setting.
– As for the operation steps, using a dial gauge, we first find the highest point on its top surface. Let’s say this highest point is measured as 20 on the dial indicator. Then reset it to 0 on the machine. After resetting the Z-axis, we need to move it to its radius. Move it apart first, then move it downwards until it reaches a radius of 12.5.
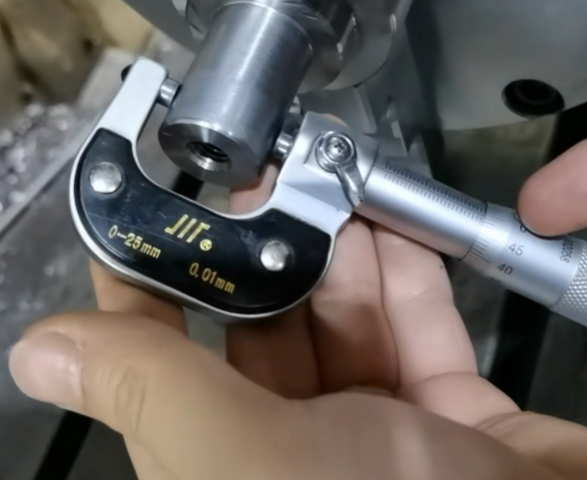
– So the z-axis is 12.5, then input Z10 into the machine tool. The reason we input Z10 is because our tool setter/touch probe has a length of 10mm. By inputting Z10, we are pre-setting the tool length offset to account for the 10mm length of the tool setter. This ensures the machine knows the exact position of the tool tip relative to the workpiece surface. By inputting Z10, we are pre-setting the tool length offset to account for the 10mm length of the tool setter. This ensures the machine knows the exact position of the tool tip relative to the workpiece surface.
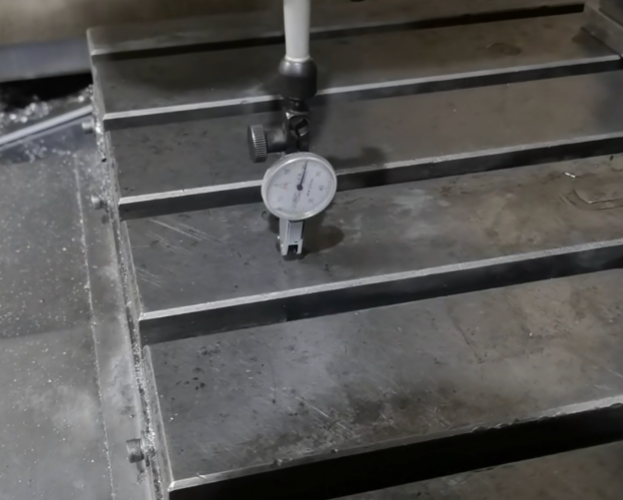
– After inputting Z10 on the machine tool screen, you need to place this number onto the workbench to calculate the distance between the center point and the workbench. Shake to the initial number of 20 and then check Z-axis value displayed on the screen. At this point, the z-axis on the screen will display 200.07, which means that the axis of workbench from that rotating axis is 200.07. After that, you can directly measure the z-axis.
By following these steps, you can accurately determine the center point on a 4-axis CNC machine and properly set the Z-axis tool offset for precise machining.